A mesh gradient tutorial in Adobe Illustrator opens up a world of creative possibilities, allowing you to achieve stunning and realistic shading and coloring effects in your vector artwork. Whether you’re an experienced Illustrator user or just starting on your design journey, mastering the art of gradient meshes can take your designs to the next level. In this comprehensive guide, we will walk you through the step-by-step process of creating a gradient mesh in Illustrator, providing you with the skills and knowledge to add depth, dimension, and richness to your illustrations. Get ready to unlock your creativity and elevate your design game with gradient meshes.
How to Create Gradient Mesh in Illustrator
Step 1: Open Adobe Illustrator 2024
Launch Adobe Illustrator 2024 and create a new document or open an existing one that you want to work on.
Step 2: Create or Select an Object

You need an object to apply the mesh gradient to. You can create a new object using various drawing tools or select an existing one in your document.
Step 3: Select the Object
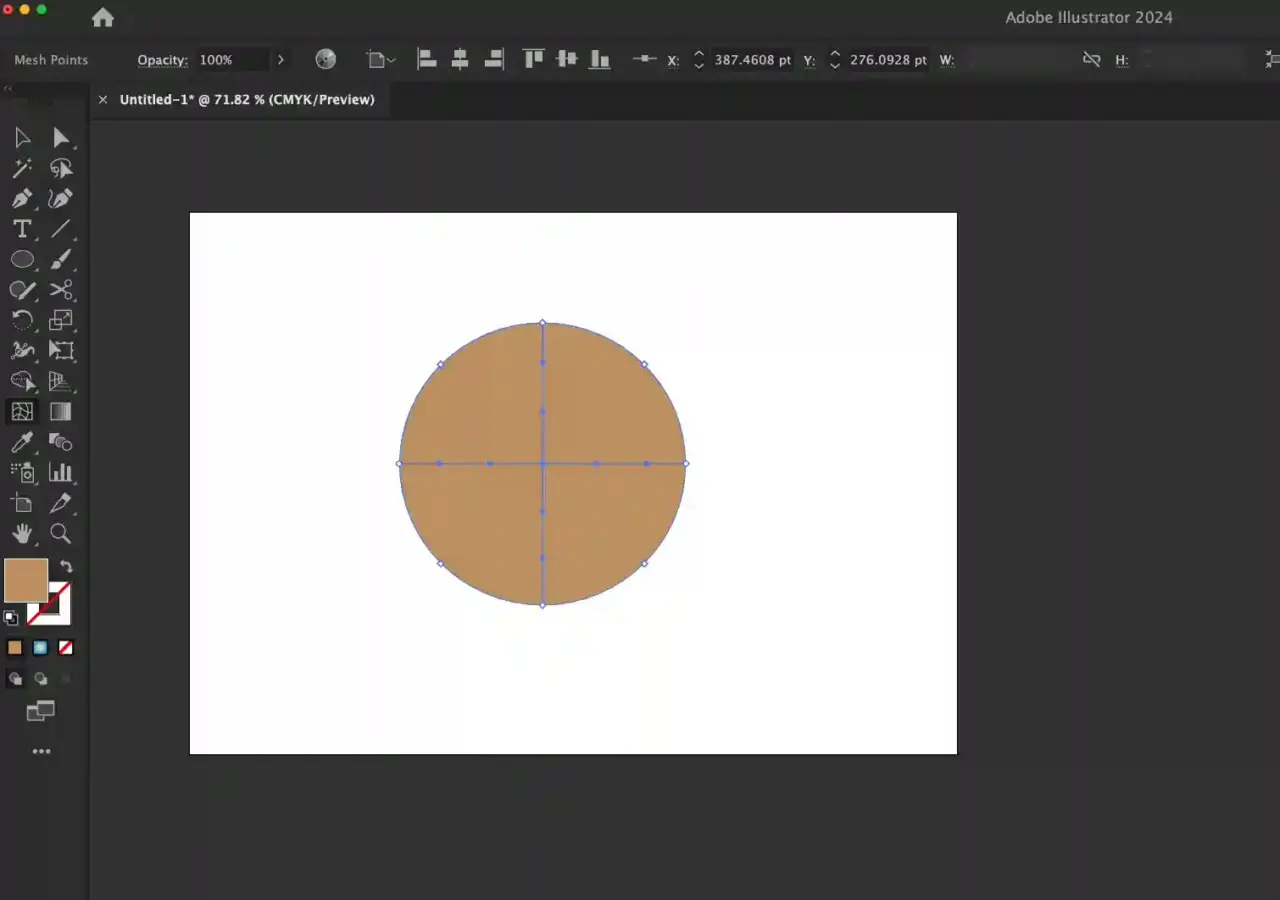
Click on the object you want to apply the mesh gradient to. It should be highlighted or have a bounding box around it once selected (as shown in the image above).
Step 4: Open the Gradient Mesh Tool

Go to the toolbar on the left side of your screen and look for the “Gradient Mesh Tool.” It looks like a mesh grid icon. Click on it to activate the tool.
Step 5: Add Anchor Points

With the Gradient Mesh Tool selected, click on the object where you want to add anchor points. These anchor points will serve as the starting points for your mesh lines.

Adobe Illustrator CC – Essentials Training Course
Step 6: Adjust Mesh Lines

After adding anchor points, you’ll notice lines connecting them, creating a mesh grid. You can add more anchor points by clicking on these lines. Adjust the placement of these anchor points to create the mesh pattern you desire.
Step 7: Select the Mesh Gradient Tool
Next, select the “Direct Selection Tool” from the toolbar or keep on selecting the mesh tool to select the anchor points. Both tools allow you to edit and apply colors to the mesh points.
Step 8: Apply Colors

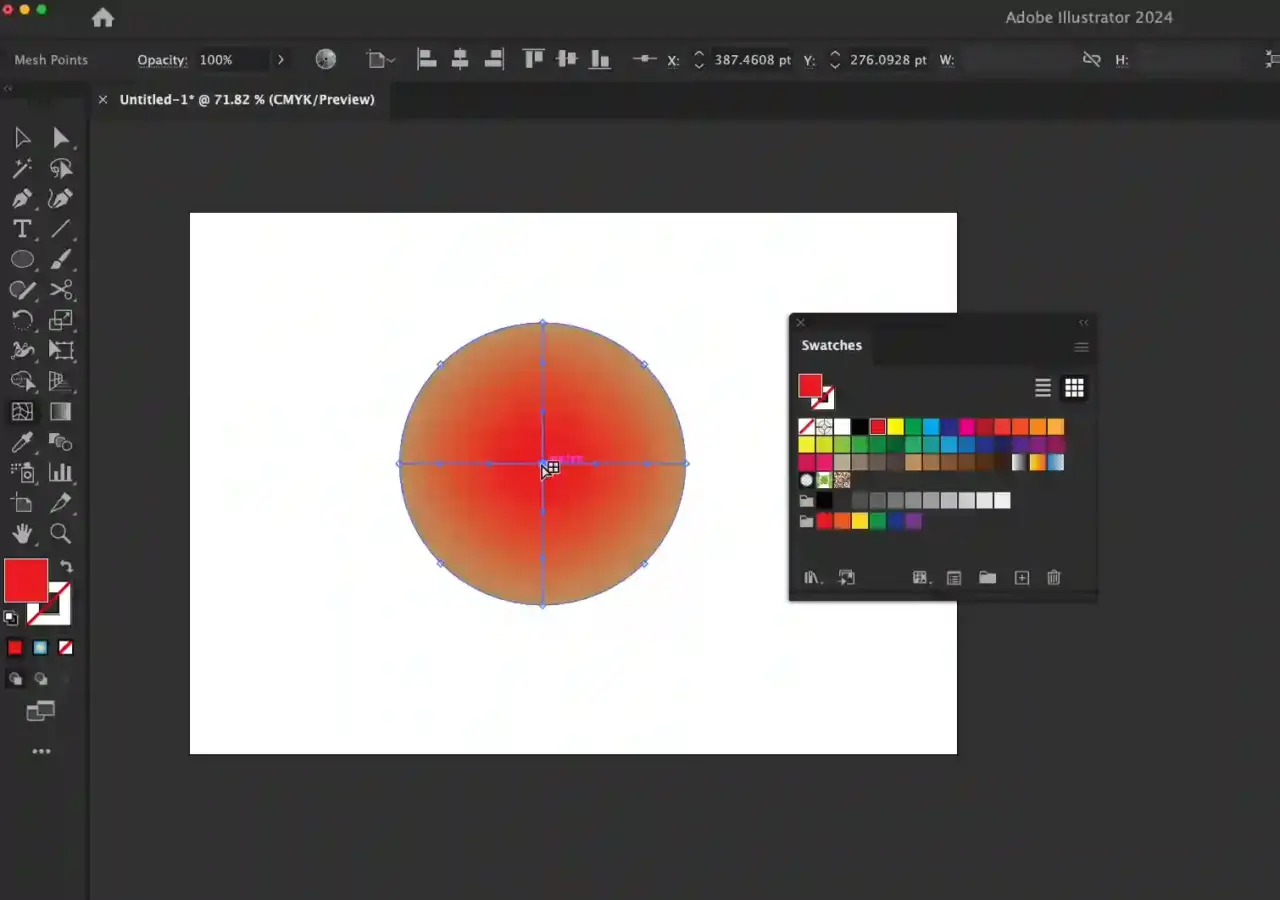
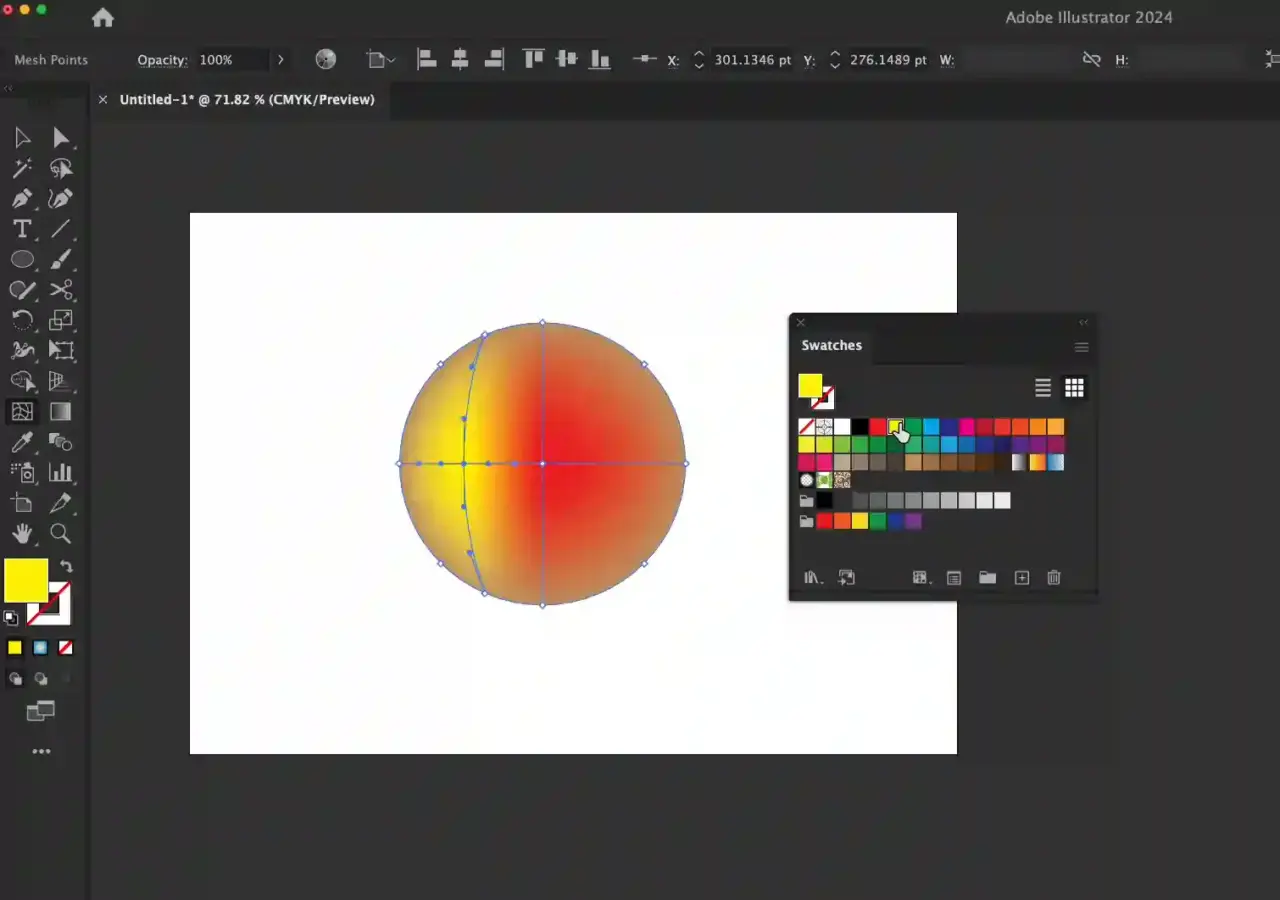
Click on an anchor point within the mesh grid and choose a color from the Color panel or Swatches. You can also adjust the color’s opacity. Continue this process for all anchor points as needed. As you apply colors, you’ll see the gradient effect forming within the mesh.
Step 9: Fine-tune the Gradient

Continue adjusting anchor points and their colors until you achieve the desired mesh gradient effect. You can also add more anchor points to create more color variations.

Adobe Illustrator – Beginner to Pro Level Graphics
Step 10: Save Your Work
Once you’re satisfied with the mesh gradient, save your Illustrator file.
Remember that creating complex mesh gradients may require practice and experimentation, so don’t hesitate to explore and refine your skills.


